Excited about real-time experience and interactive walkthrough, but also frustrated by complicated workflows and hours of unwrapping? Now it’s time to push doubts away! Epic Games has just introduced Unreal Studio plugin, a new tool to unite 3D and CAD software with Unreal Engine under one roof. This extension is bound to make life of 3D artists a lot easier and happier. Our senior CG visualizer Vasily Gushcha has tested its limits and is ready to share his own experience (spoiler: it’s gorgeous).
- Installing Unreal Studio plugin
- Plugin Workflow and Usability
- Known Unreal Studio Issues
- Summing up Unreal Studio
In this article, we will go through installation and workflow to potential issues you might encounter while creating virtual tours using Unreal Studio. Let’s get started without further ado!
Installing Unreal Studio plugin
To install Unreal Studio both into your Unreal Engine and 3ds Max just follow these easy steps. However, you are expected to already have the latest version of Unreal Engine (currently 4.19) and an active Epic Games account.
- Sign up for the free beta on unrealengine.com. You will be provided with a link to download Unreal Studio and 3ds Max export plugin.
- Once you have downloaded the extension, install it into default location. To make sure your subscription status became active, open the Epic Games Launcher and check the status in the left-hand corner.

- To verify that Unreal Datasmith has been installed, you can click Plugins under the Engine Version. If you do not see the plugin listed, you can install it manually: go into Library tab, click Install to Engine and choose your current Unreal Engine Version.
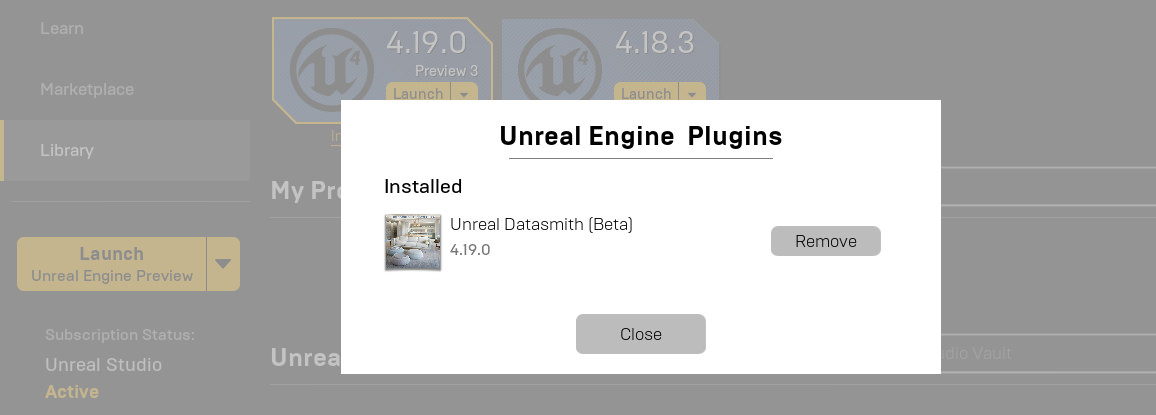
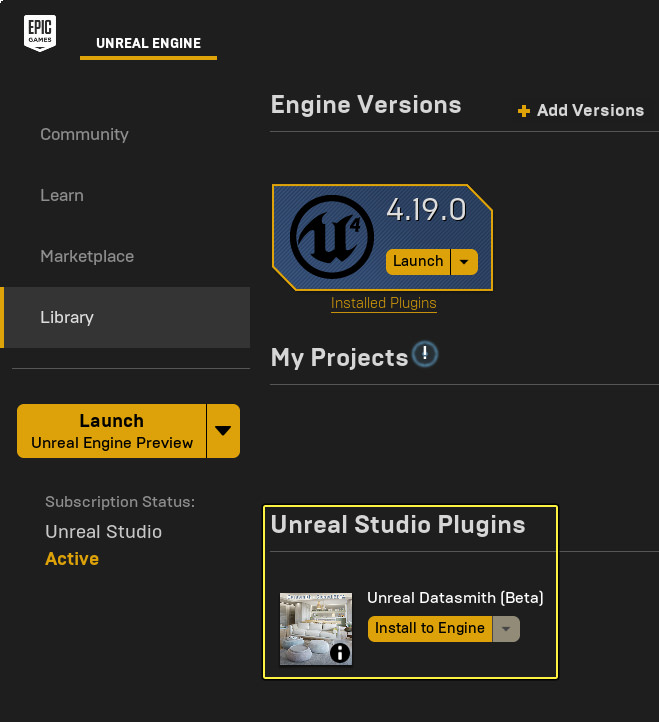
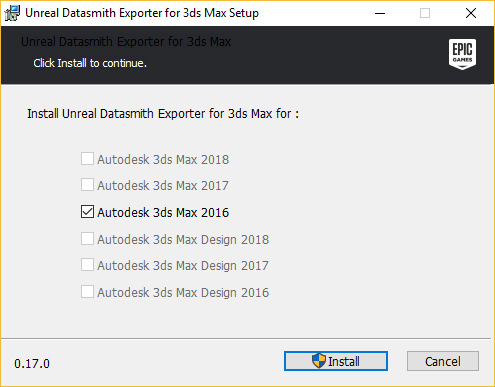
- Download and install Datasmith Exporter plugin. During Installation, it will detect the version of Max installed on your system. Indicate which 3ds Max version you want to install the plugin for.

To make sure that the plugin is correctly installed, launch 3ds Max and export any object. Under the Save as type you should be able to see Unreal Datasmith (.UDATASMITH).
As you can see, the process of installation is not that complicated. Once you have completed all these steps, you are ready to action!
Plugin Workflow and Usability



Datasmith toolkit presents many great advantages of export to Unreal Engine. First of all, it converts textures and materials, respects instances, adjusts the working unit scale and coordinates the system, pivot points, scene hierarchy and more. On top of that, it generates Lightmap UVs and converts grayscale bump maps to normal maps – all automatically. Sounds perfect, doesn’t it? Let’s take a closer look at the workflow process.
Firstly, you need to create a project with Datasmith template. To do that, you need to launch Unreal, then head into New Project and select a Blank project inside of Unreal Studio tab.
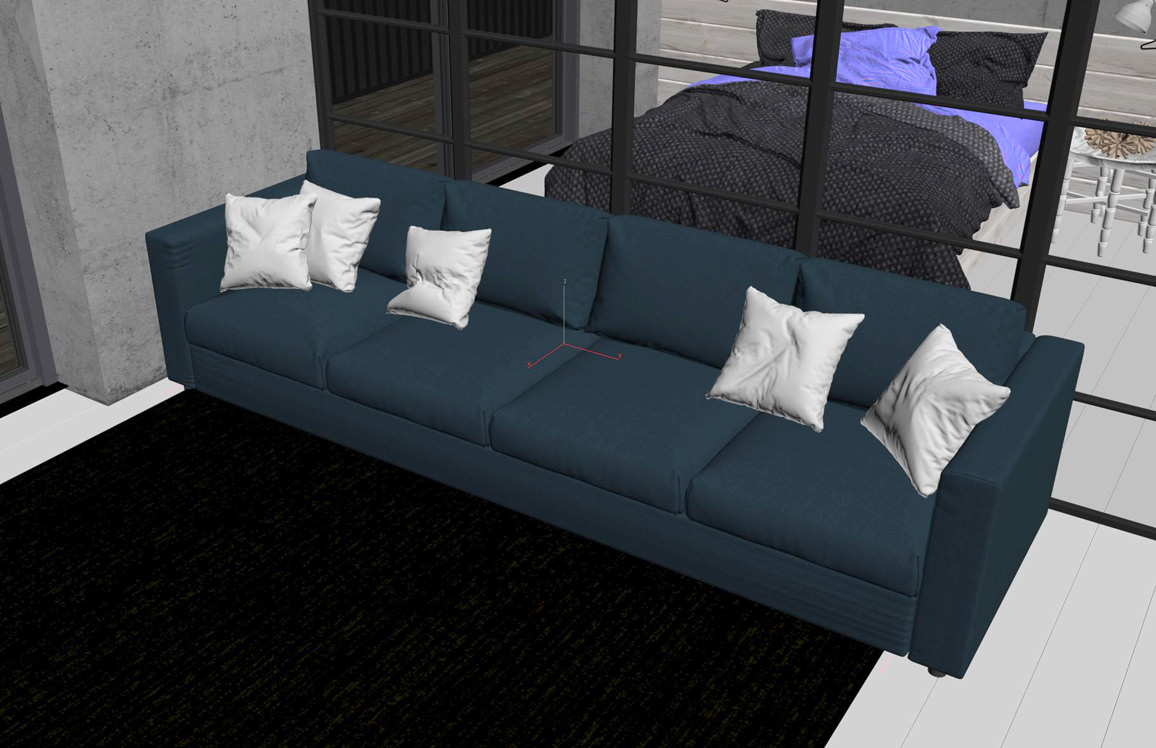
After that, you are ready to export from 3ds Max. As mentioned earlier, you can export an entire scene at once, but we found that exporting objects one by one gives you a better control of what is going on in your future walkaround project. For instance, let’s export a single sofa from our Loft Apartment project.
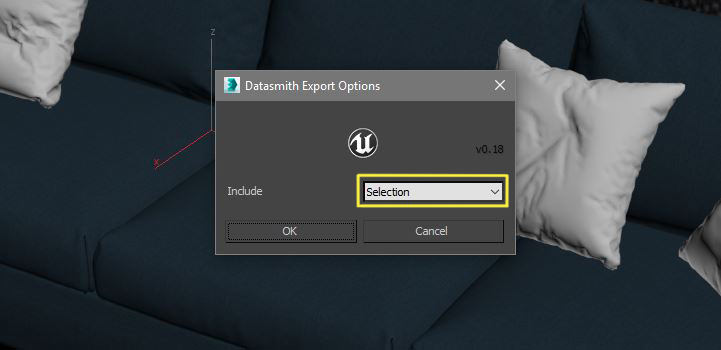
Select the object you want to export and go into File – Export – Export Selected, choose .udatasmith format, give it a name and save into your project folder. Then, an Export window will appear to specify what should be included in the export file. Since we only need a selected object to be exported, we leave it as Selection and press OK.
After that, head into Unreal Engine and select Import Datasmith button on the top panel.
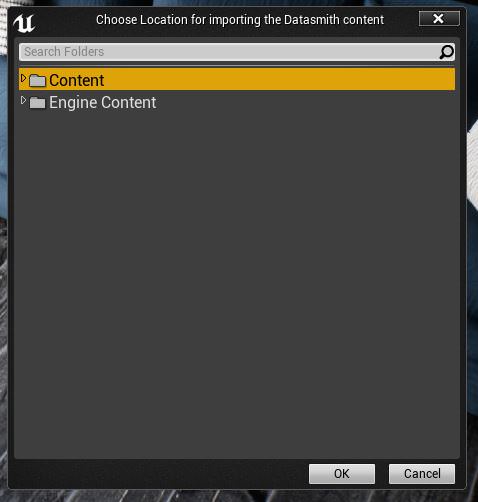
Next, select the file you recently exported and choose a location in your project where you would like to put the asset. It’s always a good practice to give your folders and assets proper names so that you don’t get lost in the project at the final stages.
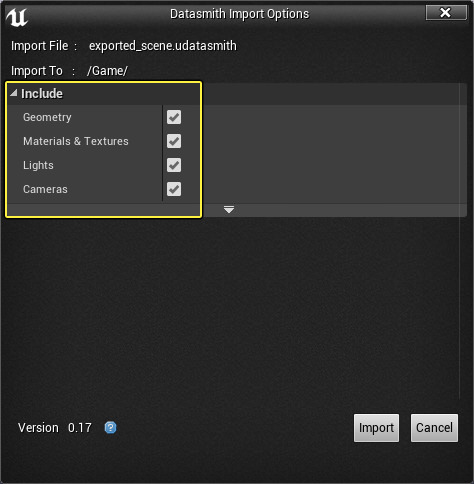
Finally, Datasmith will ask you what kind of content you want to import from your file. If it corresponds to your needs, just select Import.
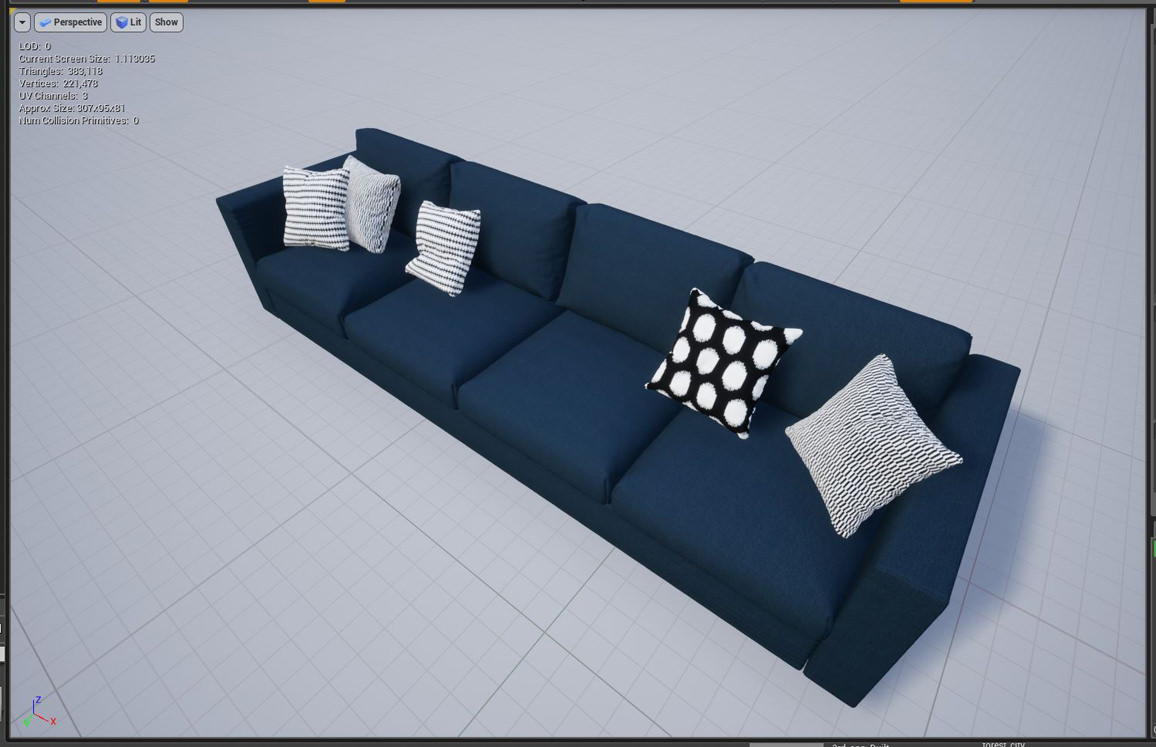
And here we go, our asset with proper materials has been successfully imported to Unreal!
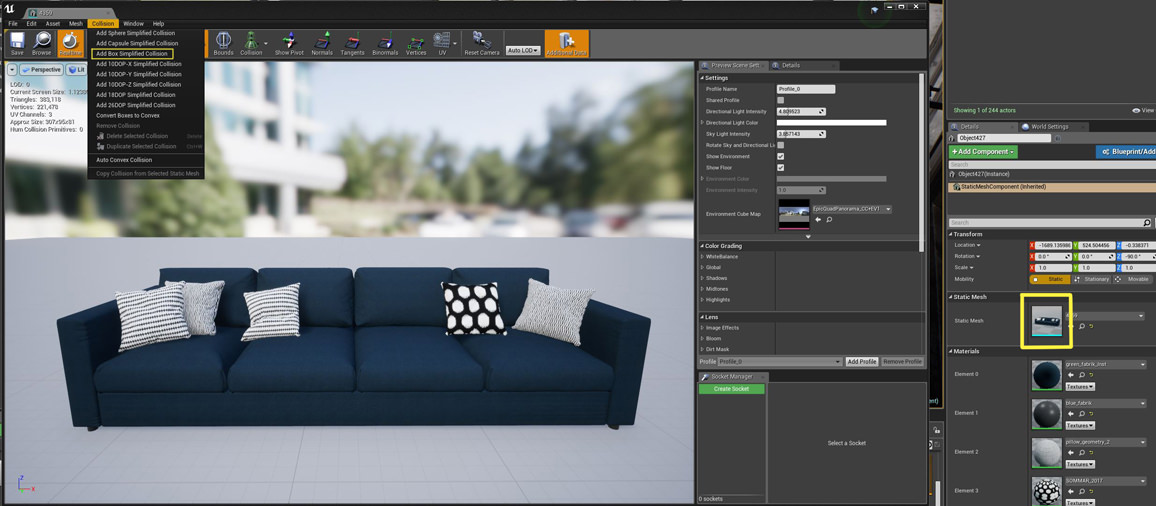
Last but not least, you need to set object’s Collision. It prevents your character from ‘going through’ the object while walking. The easiest way is to double click your Static mesh on Details panel, then scroll inside Collision and select Box Simplified Collision.
After some fine-tuning and light baking, here is the final result inside the project.
Known Unreal Studio Issues


Although Datasmith gives you a decent result exporting all of your assets, there are some things you should consider doing manually from time to time. The most common issue is lightmap errors caused by overlapping UVs and bad seams. Let’s find out how to fix them.
Here we have a vase imported to Unreal, and you can clearly see that there is something wrong with light distribution.
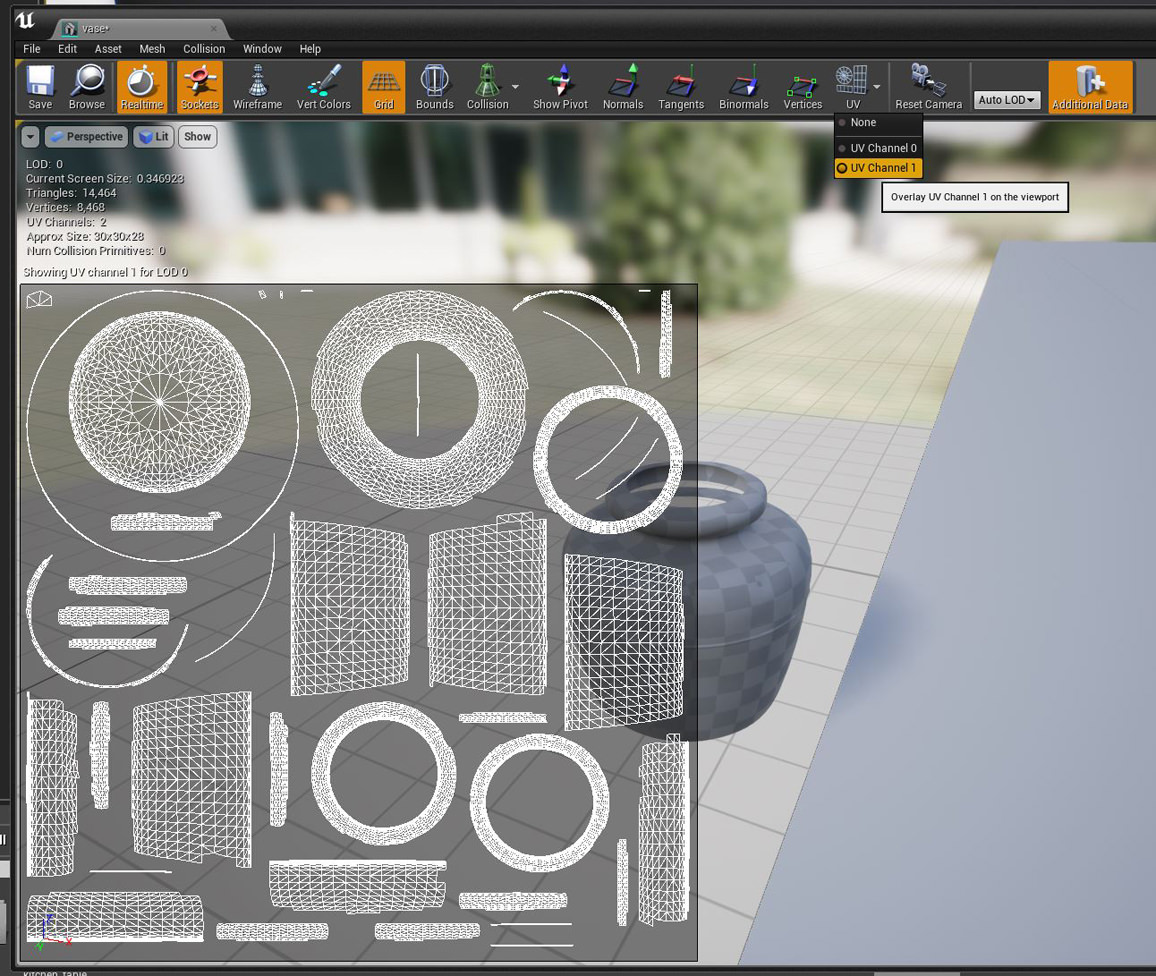
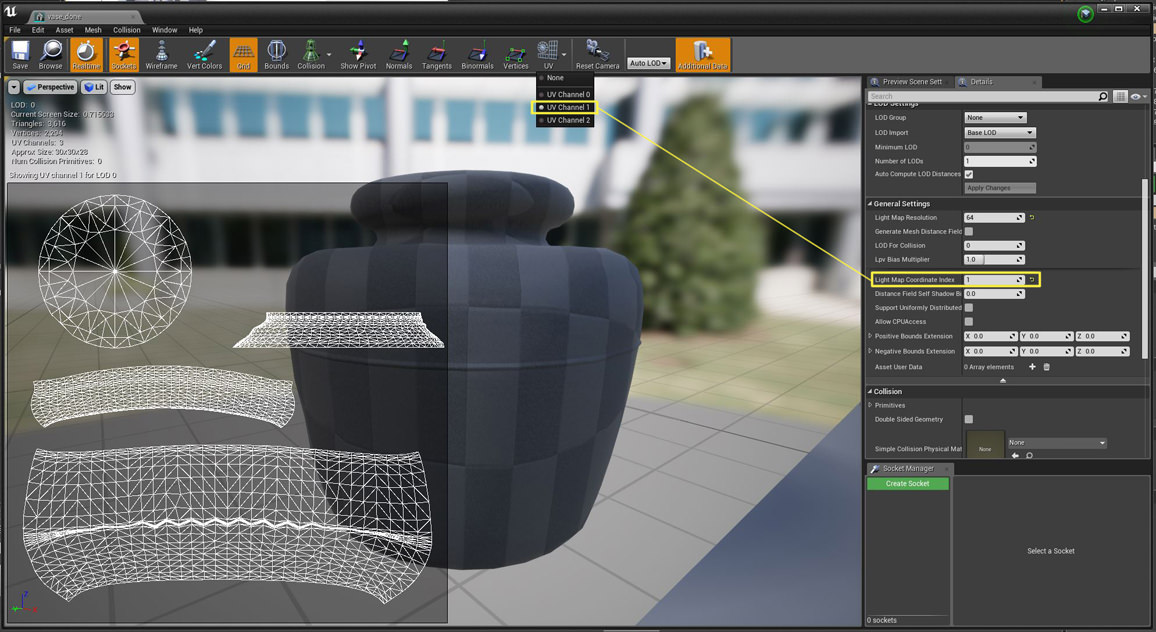
Since this vase has an uneven organic shape, Datasmith could not unwrap it properly. To control this aspect, you can open Static Mesh Editor and show UV Channel 1.
This channel usually corresponds to a channel where lightmap is stored, and on the picture above we can see that this unwrapping is definitely unacceptable. This is the result of automatic mapping, that does a pretty good job most of the time, but when it comes to organic shapes like this, it isn’t able to put seams correctly. To do it properly, we are going to take this into 3ds Max and create our own custom lightmap UVs.
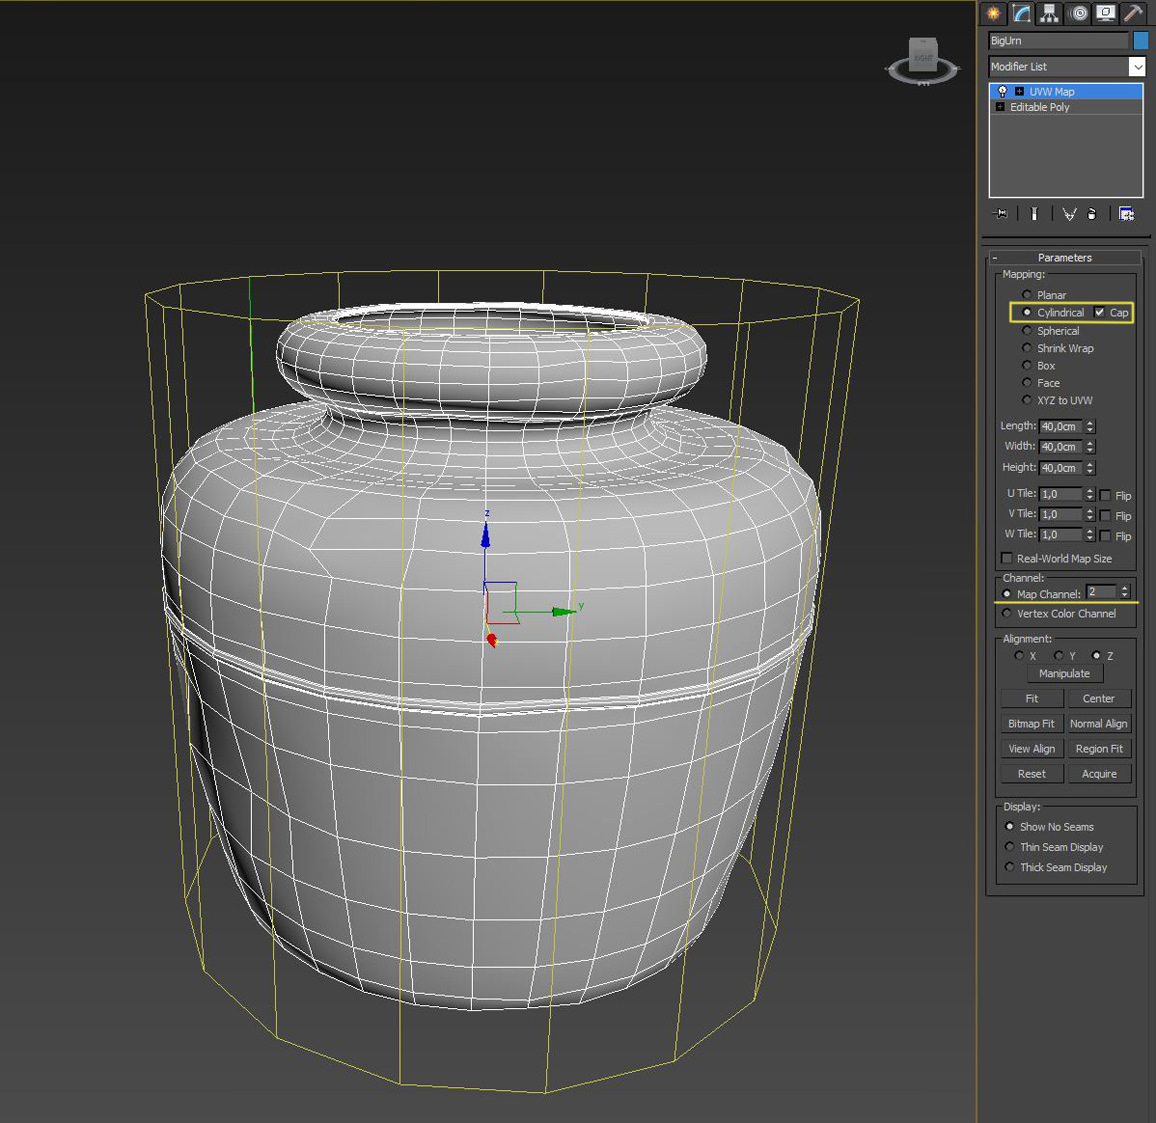
Usually, we should do it with Unwrap UVW Modifier, but in this case a basic Cylindrical map would be enough. Just make sure that your map channel is set to two, since the first channel is usually reserved for texture map.
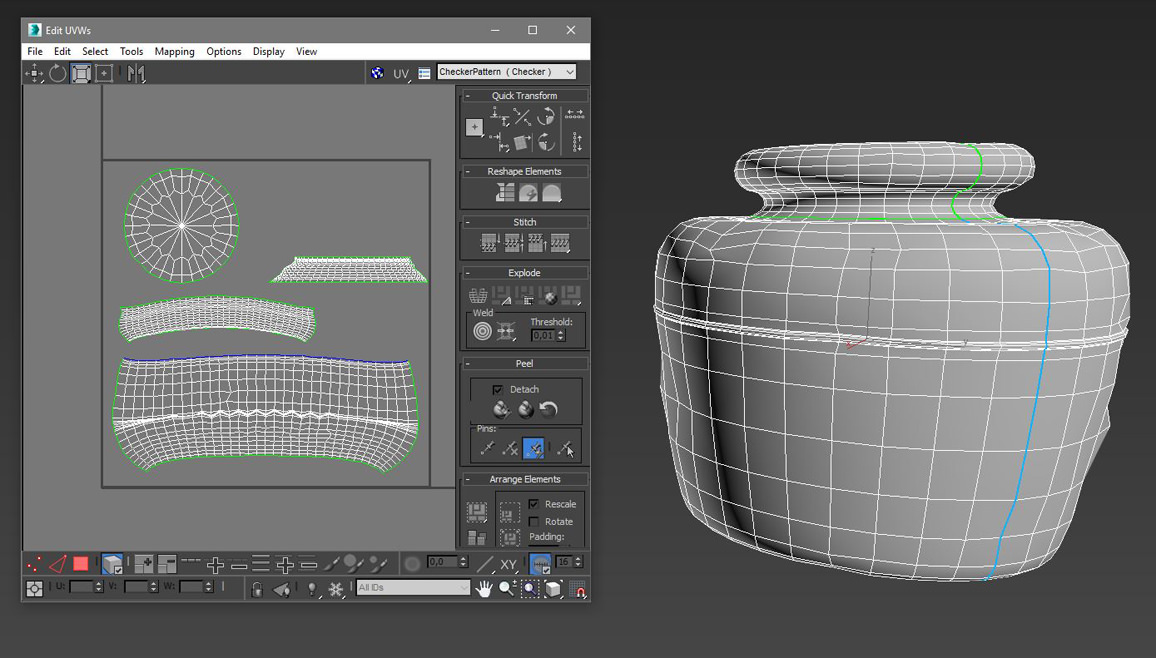
It is going to give a much better look for lightmap: we’ve got a good cap on the bottom, a good seem along the side of the mesh, and that is already a better result than that of automatic mapping.
Now, we will export it to Unreal and see how it will perform. Open it up in the Static Mesh Editor and go to the UV Channel 1 corresponding to Channel 2 from 3ds Max. Make sure this Channel 1 is specified for Lightmap Uvs: go to Lightmap Coordinate Index and set it to 1.
Finally, our vase is looking nice and clean.
Quick tip: Always make sure you have some padding around your UV charts: it will prevent overlapping and light bleeding artifacts. You can find more information about padding in official documentation.
Summing up Unreal Studio
Unreal Studio is a great tool that allows 3D artists to save a lot of time during preparation and exporting data to Unreal Engine. The time saved could be spend on perfecting artistic aspects like tweaking materials, setting up desired lightning and art-directing your walkthrough project in general.

However, there are always some minor technical things you still need to do by hand. In future such tools as Unreal Studio will manage them all leaving you only with the artistic side of your virtual tour.
Find out how to install and setup Unreal Engine 5 plug-in here.